
If you’re searching for How to create Payoneer account, you probably want a clear, detailed guide that actually explains everything without confusion. I’ll walk you through the full process in a simple, conversational way so you can set up your account confidently, even if you’ve never used Payoneer before.
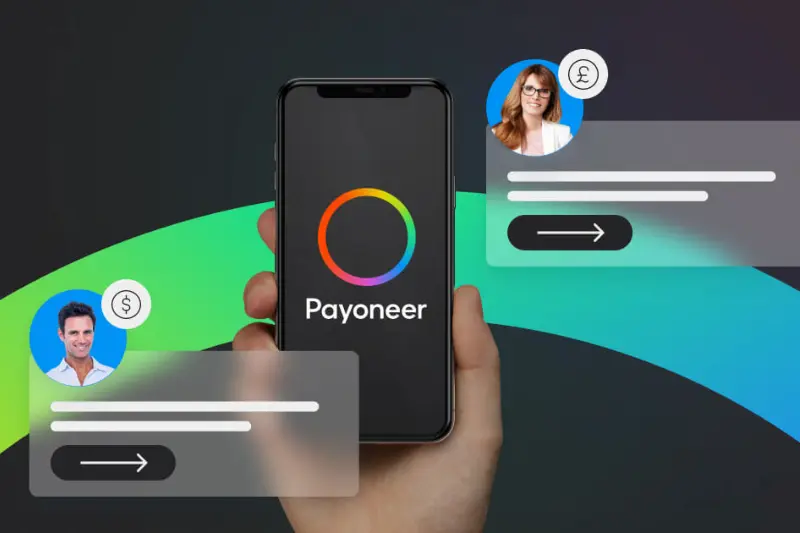
Payoneer is widely used for receiving international payments, especially by freelancers, online sellers, and remote workers. So learning How to create Payoneer account properly can really help you start earning and receiving money from global clients without hassle.
Understanding Payoneer Before You Start
Before going into How to create Payoneer account, it’s helpful to understand what you’re signing up for.
Payoneer is a global payment platform that acts like a bridge between you and international companies. Instead of waiting for complicated bank transfers, Payoneer allows you to:
- Receive payments from abroad
- Withdraw money to your local bank
- Get paid from freelance platforms
- Manage multiple currencies in some cases
It is trusted by many global marketplaces, which is why so many people want to learn How to create Payoneer account correctly.
Requirements Before Creating a Payoneer Account
Before starting How to create Payoneer account, make sure you have these things ready:
- A valid email address (important for login and verification)
- A government-issued ID (CNIC, passport, or driving license)
- Your correct residential address
- A working bank account in your name
- A phone number you can access
Having these ready will make the process of How to create Payoneer account much smoother.
Step-by-Step Guide: How to create Payoneer account
Now let’s go through the full process in detail.
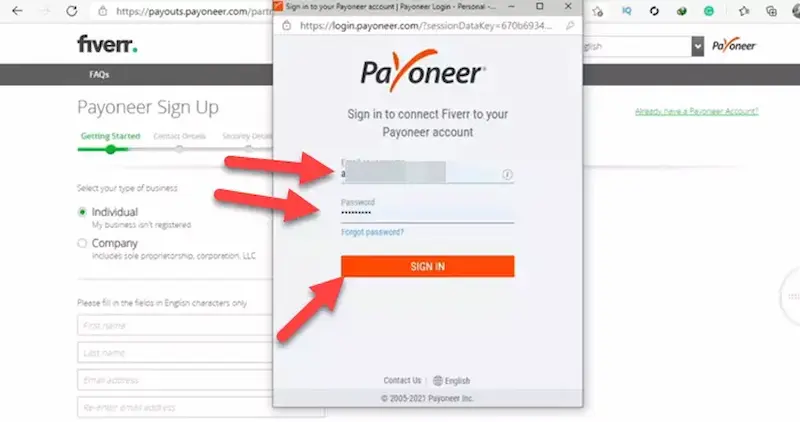
Step 1: Go to the Official Sign-Up Page
The first step in How to create Payoneer account is visiting the official Payoneer website and clicking on the “Sign Up” or “Register” button.
You will see an application form where your journey begins.
Step 2: Select Account Type Carefully
When learning How to create Payoneer account, you must choose the correct account type:
- Individual Account: For freelancers, students, or personal use
- Business Account: For companies, agencies, or sellers
Choosing correctly is important because it affects verification and payment options later.
Step 3: Fill in Personal Details
This is one of the most important parts of How to create Payoneer account.
You will be asked to enter:
- First and last name (must match your ID exactly)
- Email address
- Date of birth
- Country of residence
- Full residential address
Be careful here. Even a small mistake can delay approval.
Step 4: Add Contact Information
Next step in How to create Payoneer account is entering:
- Mobile number (for verification codes)
- Alternative contact details (if required)
Payoneer uses this information to confirm your identity and protect your account.
Step 5: Create Login Credentials
During How to create Payoneer account, you will set:
- A strong password
- Security questions (in some cases)
Use a password that is strong but easy for you to remember. This keeps your account secure.
Step 6: Add Your Bank Account Details
One of the most important steps in How to create Payoneer account is linking your bank account.
You will need:
- Bank name
- Account holder name (must match your Payoneer name)
- Account number or IBAN
- Branch code (if required in your country)
This step is necessary because this is how you will withdraw your money.
Step 7: Submit the Application
Once everything is filled, you submit your application.
At this point in How to create Payoneer account, Payoneer will review your information. This process can take anywhere from a few hours to a few days.
Step 8: Identity Verification
After submitting, you may be asked to verify your identity. This is a normal part of How to create Payoneer account.
You might need to upload:
- National ID card (front and back)
- Passport or driving license
- Address proof (utility bill or bank statement)
Make sure documents are clear and readable to avoid delays.
Step 9: Account Approval
Once your details are verified, Payoneer will approve your account. You will receive an email confirmation.
Now your process of How to create Payoneer account is complete, and your account is ready to use.
You may also like to read this:
How To Receive International Payments Guide 2026
Ultimate Guide To Secure Digital Payment Options Online
Fast & Secure Online Money Transfer Apps For Worldwide Use
Best Payment Gateways For International Money Transfers
Ultimate Digital Wallet Guide For Fast Digital Payments
What You Can Do After Creating Your Account
After successfully completing How to create Payoneer account, you can:
- Receive payments from freelance platforms
- Get paid by international clients
- Withdraw funds to your bank account
- Track your transactions easily
Common Problems and How to Avoid Them
When learning How to create Payoneer account, people sometimes face issues. Here’s how to avoid them:
1. Wrong Name Details
Always match your name exactly with your ID.
2. Incorrect Bank Information
Double-check your bank account number and name.
3. Blurry Documents
Upload clear, high-quality images of your ID.
4. Email Not Verified
Always verify your email as soon as you sign up.
Tips for Faster Approval
If you want your How to create Payoneer account process to be faster:
- Use accurate information
- Avoid spelling mistakes
- Submit clear documents
- Make sure your bank account is active and in your name
Final Thoughts
Now you have a complete understanding of How to create Payoneer account from start to finish. It may look like a lot of steps, but once you go through it carefully, it becomes very straightforward.
The key is to be accurate and patient during verification. After that, you’ll have a fully functional Payoneer account ready to receive international payments easily.
If you follow this guide properly, How to create Payoneer account becomes a simple and stress-free process that opens the door to global earning opportunities.
FAQs – How to create Payoneer account
1. Is it free to create a Payoneer account?
Yes, signing up for Payoneer is generally free. However, some services like currency conversion, withdrawals, or receiving payments may include small fees depending on your usage.
2. How long does it take to create a Payoneer account?
The registration process usually takes 10–20 minutes. But approval and verification can take anywhere from a few hours to a few days, depending on your documents and details.
3. What documents are required for Payoneer verification?
To complete How to create Payoneer account, you may need:
National ID card or passport
Proof of address (utility bill or bank statement)
Bank account details
4. Can I create a Payoneer account without a bank account?
You can start registration, but you will need a bank account to fully activate and withdraw funds. So a bank account is required in the later steps of How to create Payoneer account.
5. Is Payoneer safe to use?
Yes, Payoneer is considered a secure and trusted global payment platform. It uses encryption and identity verification to protect your account and transactions.